


Headless Automation testing is a way to run light-weight tests without opening a physical browser. Headless, as the word suggests, means without being seen. So basically, a headless browser is a web browser without a graphical user interface. Hence, with Headless Automation, users would not see any direct browser interaction and most of the functionalities would run from the back end, via command-line interface or network communication.
Quick fact: Google started using headless browsing from 2009 in order to index contents of websites using Ajax.
Now let's dive into Headless Automation with Selenium and PhantomJS
Initially, I used Casperjs to carry out automation for a few test cases. Being new to JavaScript, it was a bit time consuming for me to learn the implementation of Casperjs along with the implementation of JavaScript. So now I use PhantomJS driver for headless automation with Casperjs as a wrapper over PhantomJS to extend its capability. It was quite easy to implement and interesting to see it run in a headless way. That is when I started researching other ways of integrating PhantomJS with Selenium. After quite a bit of research I found out that the PhantomJS driver is itself readily available with the Selenium library.
Before we go any further, let’s understand what PhantomJS is. It is a webkit which runs headless with an inbuilt JavaScript API. It has fast and native support for various web standards such as DOM handling, CSS selector, JSON etc. It is quite fast as compared to running tests using Selenium web driver. PhantomJS uses the WebDriver Wire Protocol implementation which is achieved by GhostDriver running at the back end of PhantomJS.
Using PhantomJS driver with Selenium is quite easy, since one can use their own implementation technique to automate test suites using PhantomJS. For example, I used Java to implement the test scenarios with PhantomJS as a browser to run the desired test cases.
Now let’s get down to business.
Pre-requisites
-
You will need the binary executable file of PhantomJS. Make sure the PhantomJS is version 2 or above.
-
Java Development Kit installed on your machine.
-
Eclipse IDE (this is not mandatory). You can also run your test cases from your console.
-
Selenium jars.
-
Test-NG. I used Test-NG to run the test cases. One can also use the normal java implementation to run the test cases.
Steps for Automation
Step-1: Open Eclipse IDE and create a Java project.
The following screen will appear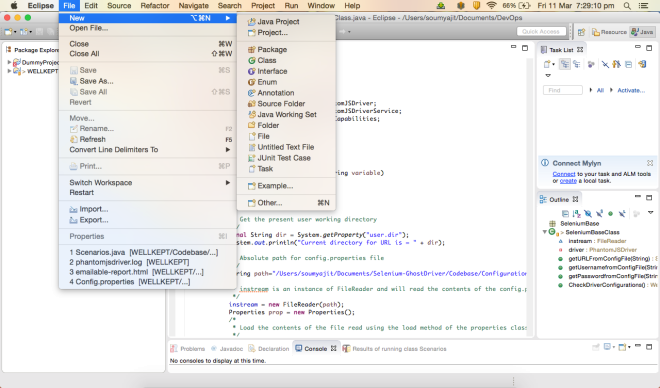
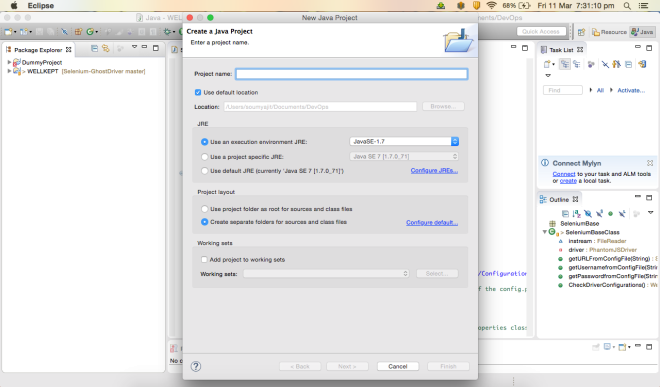
Step-2: Create the required project. Now when you click on you project you will see the following folder structure.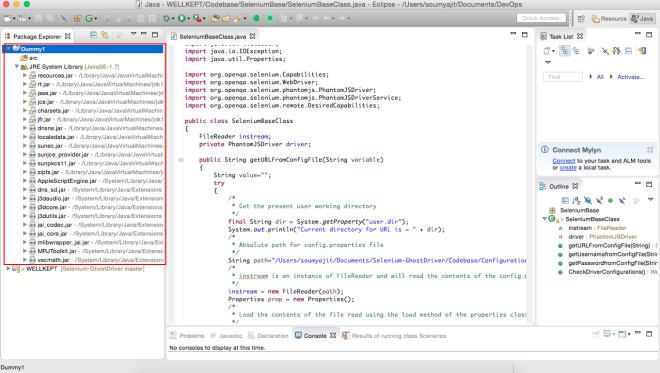
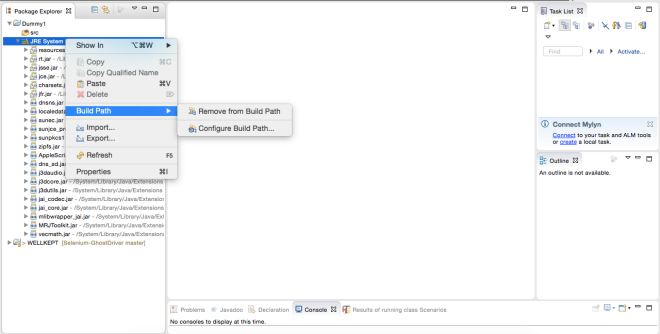 Step-3: By default there would be a set of system jars present. You would have to import the required selenium jars in order to get started. Follow the required screenshots
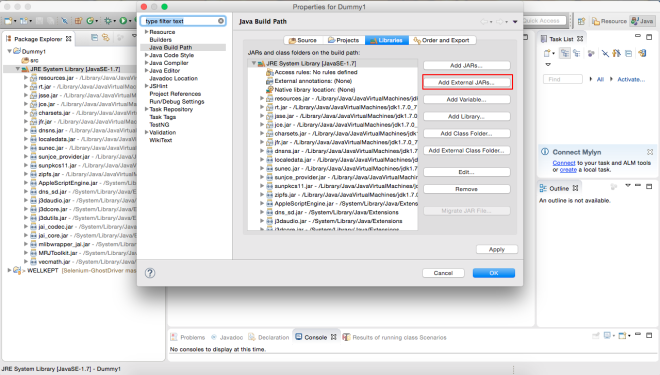
Now comes the secret ingredient that would help you start running your automation using PhantomJS.
Capabilities caps = new DesiredCapabilities();

((DesiredCapabilities) caps).setJavascriptEnabled(true);

((DesiredCapabilities) caps).setCapability(“takesScreenshot”, true);

((DesiredCapabilities) caps).setCapability(

PhantomJSDriverService.PHANTOMJS_EXECUTABLE_PATH_PROPERTY,

“//Users//soumyajit//Documents//Zippers//phantomjs//bin//phantomjs”

);

driver = new PhantomJSDriver(caps);

return driver;
As you can see, I have used Capabilities class and its required methods to configure the driver instance as in order begin execution on the browser side. In the above snippet, I have set the desired capability to get the path of the binary PhantomJS execution file. Also, I have set PhantomJS to take screenshots.
You can also set the capability to ignore all SSL alerts appearing by using this line of code:
((DesiredCapabilities) caps).setCapability(PhantomJSDriverService.PHANTOMJS_CLI_ARGS,new String[] {“–web-security=no”, “–ignore-ssl-errors=yes”});
I have used absolute path to point to the PhantomJS binary execution file. But best practice is to use relative path as it would be more generic to a system.
And now we are set to run our automation test case.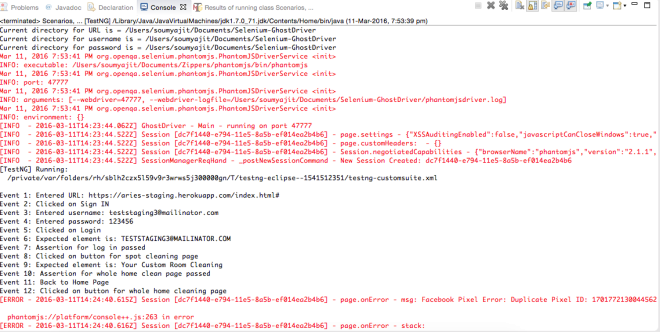 This is the view of my console where the test cases are running.
A few points with respect to the console where you see the test cases running:
- Your console or the CLI where the tests are being executed by PhantomJS starts acting as a browser console.
- Users start seeing browser console related errors while the tests are running. This as an added advantage because if there is a fatal console error that may lead to someone cracking the system, these can be reported earlier to ensure the protection of the application.
- There is a also the PhantomJSdriver log which separately guides the user with the browser behaviour, such as page settings for each session, what are the errors in case there is any failure in running the test cases etc.
Here's what the phantomjs driver log looks like: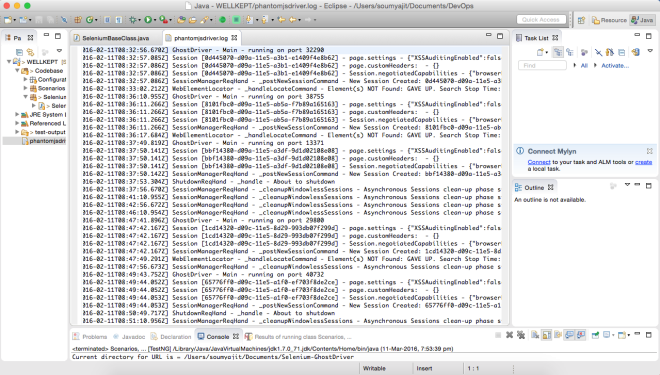 So this is the long and short of headless automation using phantomjs. For further resources you can visit //github.com/SoumyajitBasu1988/Selenium-PhantomJSDriver
Please do provide your feedback and any doubts in the comments below.