


The last post I wrote was called Microservice Architecture is Not for You, though I mentioned in that post that I have nothing against this type of architecture—it’s just that it does not seem the right way to do things if you have to start out with it. Yet, I would like to explain how to design and write your microservice architecture application.
We will create a Sinatra application as one microservice named “Profiles”. We can use this service to create profiles of different entities within our application, like users, admins, companies, etc.
But, for the sake of simplicity, we will only use this microservice to create user profiles, and we will design this microservice using RESTful principles.
Below is the basic architecture of how our application would work, and the full working source code is available at github. Download the complete source code and follow the guide below to understand how this works.
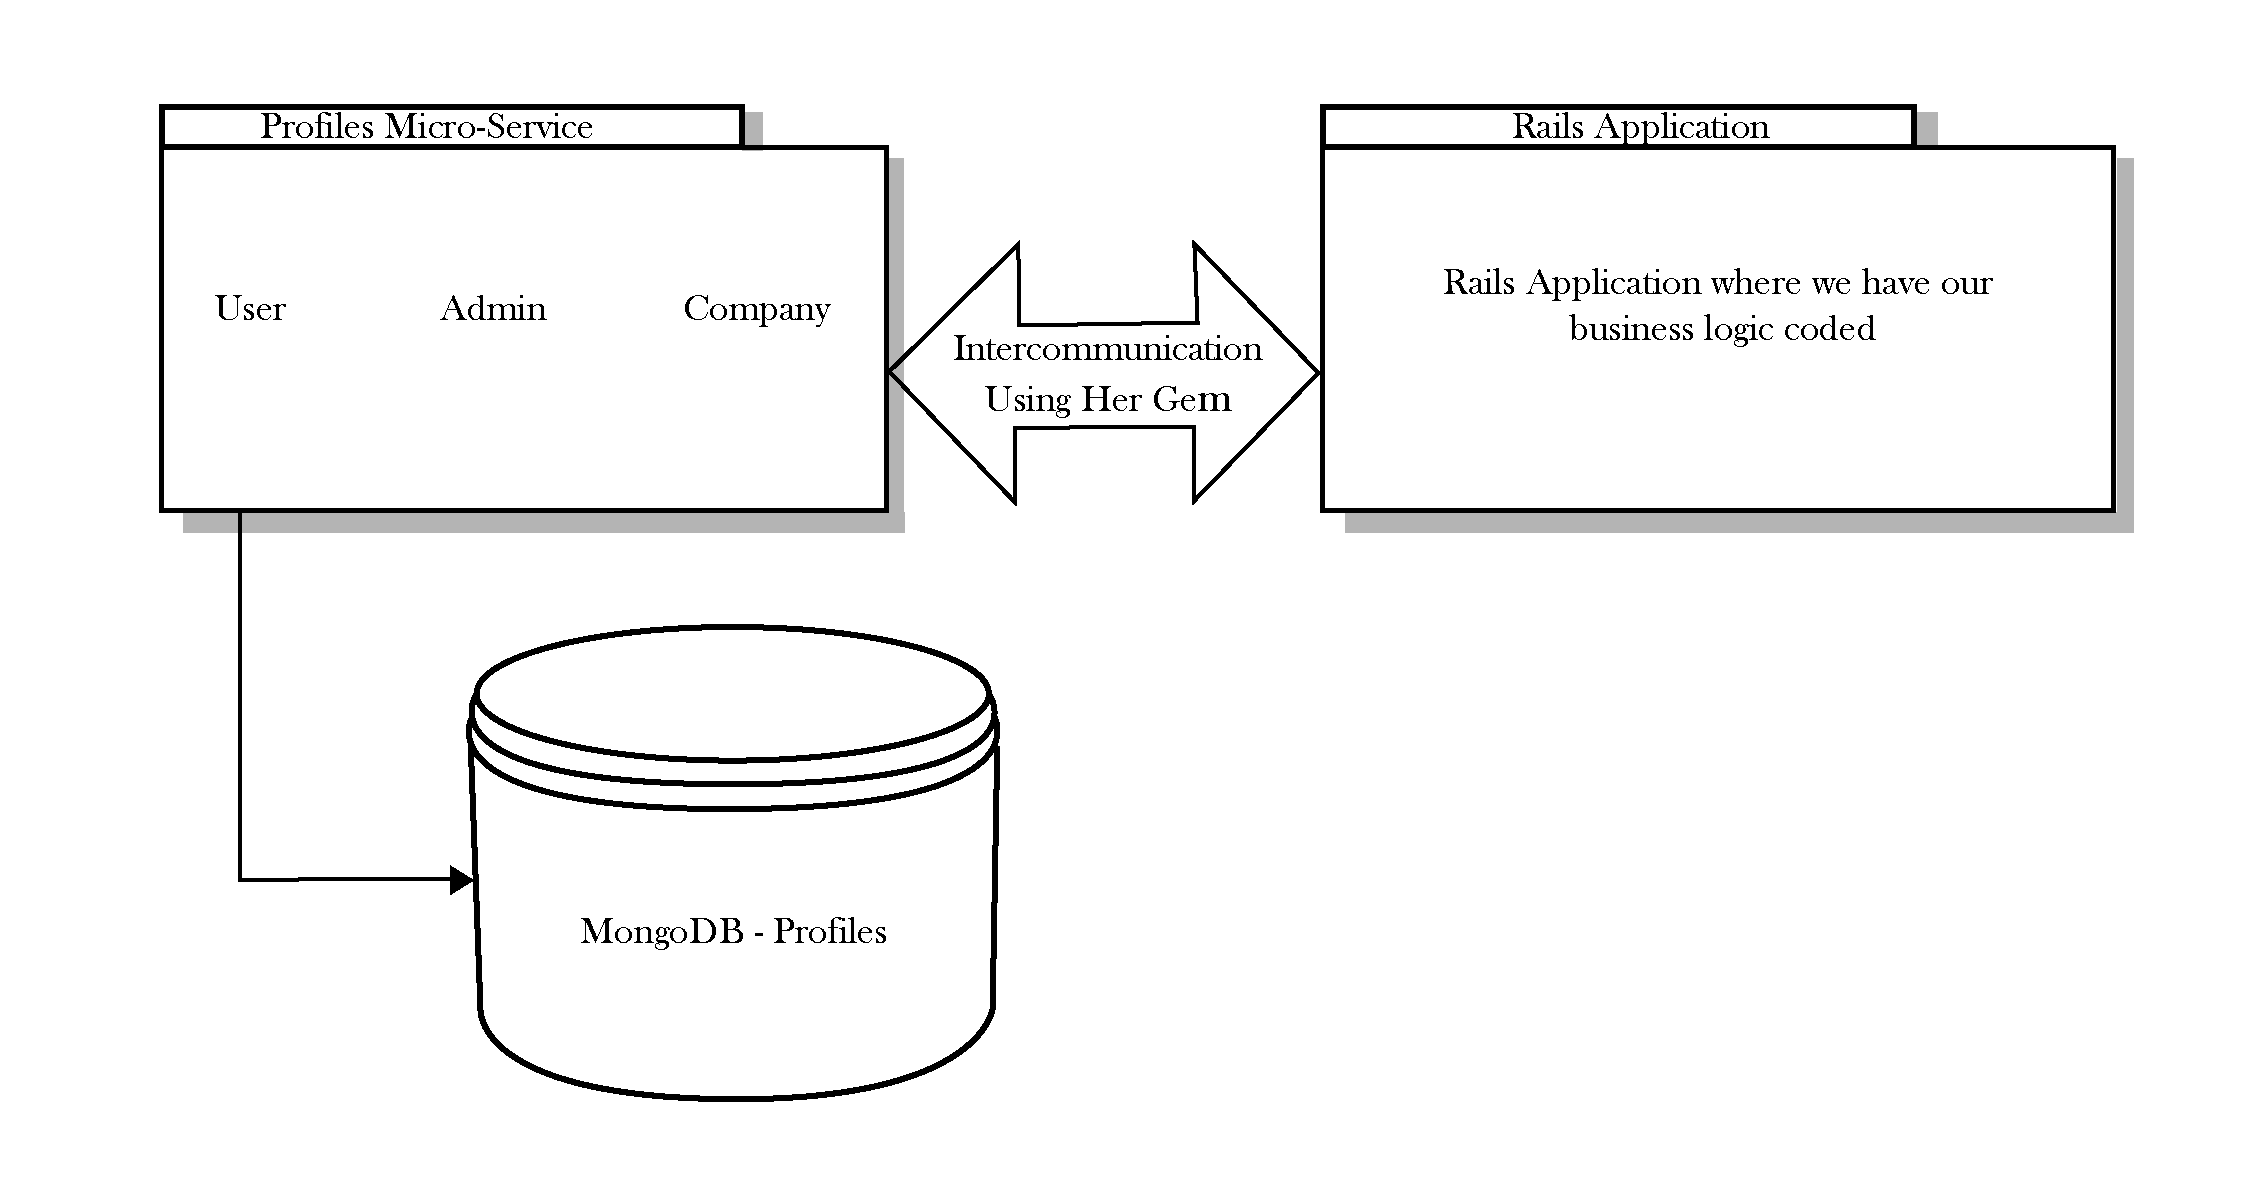

We can use any database in our service, be it MySQL, Postgres, MongoDB, etc. In this case, we have used MongoDB.
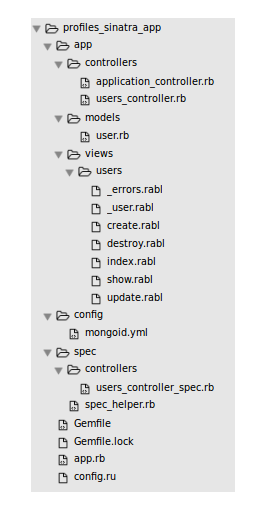
The Sinatra application is fairly simple, and its directory structure is very similar to Rails applications.
We can use any database in our service, be it MySQL, Postgres, MongoDB, etc. In this case, we have used MongoDB.
The Sinatra application is fairly simple, and its directory structure is very similar to Rails applications.
There are controllers, models and views directories where our respective files are stored. Take a look at the two files config.ru and app.rb.
#app.rb
$: << ‘app’
module Profiles
Dir[File.join(File.dirname(__FILE__), ‘app’, ‘*.rb’)].each do |f|
autoload File.basename(f, ‘.rb’).camelize.to_sym, f
end
Dir[File.join(File.dirname(__FILE__), ‘app’, ‘models/**/*.rb’)].each do |filename|
autoload File.basename(filename, ‘.rb’).camelize.to_sym, filename
end
Dir[File.join(File.dirname(__FILE__), ‘app’, ‘controllers/**/*.rb’)].each do |filename|
autoload File.basename(filename, ‘.rb’).camelize.to_sym, filename
end
end
We have added app directory into the load path variable “&:”. Otherwise, we would have had to specify the full path of the files to autoload. We have autoloaded the controllers and models, otherwise we would have had to require or load the files according to their dependencies. So +1 to Ruby for that :)
Now, look at the routes method:
#app.rb
def self.routes
{
“/” => Profiles::ApplicationController,
“/users” => Profiles::UsersController
}
end
We have specified our routes as a hash and passed this hash to the Rack::URLMap.new instance in the config.ru. Take a look at that.
#config.ru
require ‘bundler’
Bundler.require
require “#{File.dirname(__FILE__)}/profiles” #we require the profiles.rbfile where we have autoloaded all our controllers and models; we could also add any other configurations etc in that file.
run Rack::URLMap.new Profiles.routes #routing is done as specified in the method routes in file profile.rb
The controllers and models are fairly simple to understand, so I will skip that. Our microservice would render the JSON response, and for this we have used RABL. You can find more documentation here.
We have used her gem to communicate with our microservice from the Rails app. You can read more about how her gem works using the link provided.
If you see the “config/initalizers/her.rb”, we have specified the API location as “http:// localhost:3001/” because our service is running on that port locally. This is also what the her library from the Rails application will talk to.
Apart from that, do check out the code as it is very simple to understand. In case you have any trouble understanding it or running the application, just leave a comment below with your problem, and I will try to solve it.
I would have given the whole code of the service and the Rails application here, but that would have made this post too long to read for most of you. So, I chose to focus more on working the code than on telling this time.