


Automation has now become a norm across sectors, and when used in testing, it can undoubtedly improve the depth and scope of the tests. Since it is not possible to test everything manually, so using Postman automation can save our time as well as efforts.
Postman is the ultimate tool for API automation. In this blog, we will be taking a look at how to achieve API automation using Postman.
If you are new to Postman, read API Testing using Postman for an overview of what Postman is and how it works.
Example Scenario for Automation using Postman
Let’s say, a login API generates a Token (oAuth, JWT etc) and refreshes it every hour. The API utilizes this token to get the expected response. If we don’t automate, we will have to copy and paste this every time for each API.
And for a test suite containing 100 API’s, a good amount of manual effort will go into pasting the token for each API. By introducing automation, this process of updating the newly generated taken can be automated.
Let’s automate the Login API through Postman
-
Open Postman Application and create a collection.
-
Then make a POST request to Login API by passing the correct credentials (Body Parameter+Header)
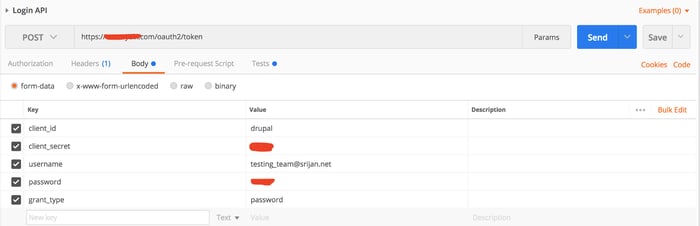

3. Now click on Send button to see the response.
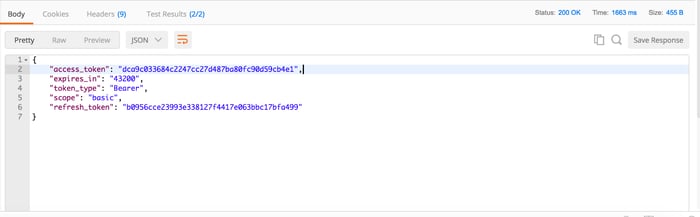
4. In the above response, we get an “access_token” key which would be used in all the following API’s. Hence, we need to write a custom code which can define the variable, and update its value with every hit to the Login API. Going further, we will use this variable for access_token value and would not need to copy and paste the access_token value for each API.
5. Also, we can create the variable for host_name, protocol etc so that we don’t need to write the protocol and host_name for each API, instead we can use the variable.
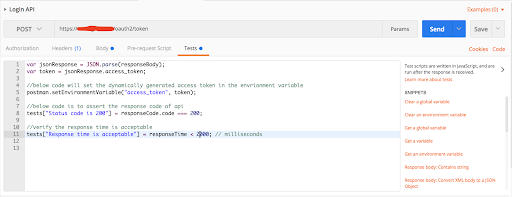
6. Another important aspect is to check for correct Response/Status Code and the Response Time for each API. It would be really great if we can write the code for this task too, so that when we run our entire API test suite. We can easily view all the failing tests which does not give correct status code as well as all those API’s which are taking more than an acceptable response time to execute.
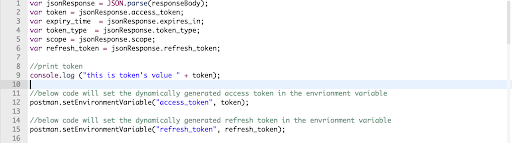
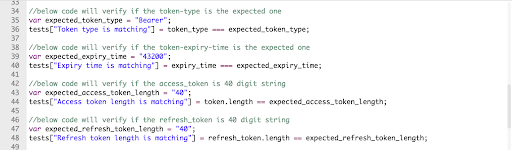
7. Below is the sample code snippet which would solve all the above problems.
8. You can see the value of access_token is set in the environment variable as expected.
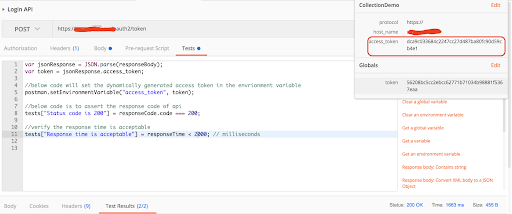
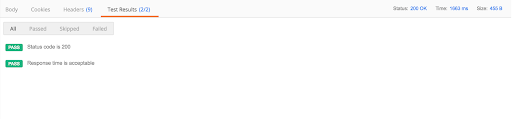
9. Also, under TestResults tab you can check if the assertions you wrote have been passed or failed.
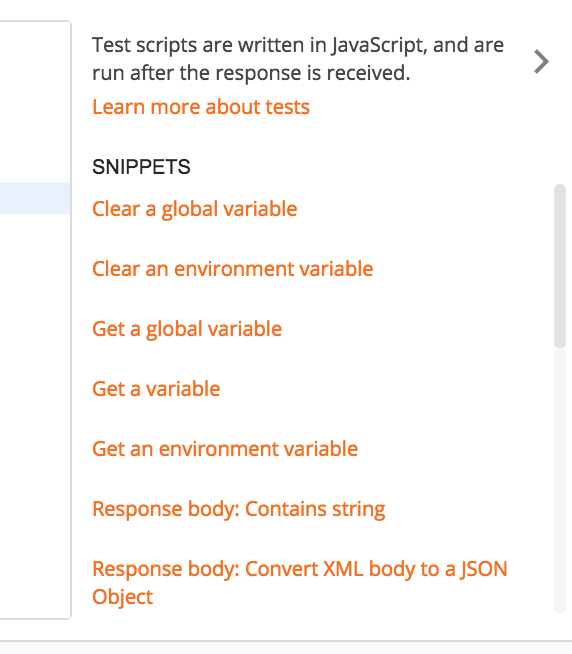
10. Postman itself provides us with lots of code snippets, you just need to click on the desired code snippet and the generated code adds in the Tests tab to perform assertions/actions. To get the snippets, click on Tests tab and then on the arrow “<” to see the snippets.
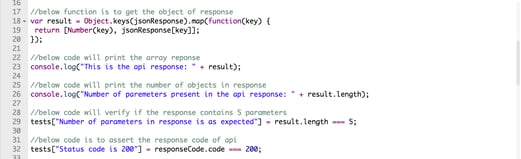
11. If you want to add more custom code, you can always do so depending on your requirements, a couple of them are mentioned in the screenshots below:

That’s all for this blog. Happy Testing!!